Step-by-Step Tutorial: Removing White Backgrounds in Photoshop Made Easy
Part 1: Why Do We Need to Remove the Image’s White Background?
Removing the white background from images is a common practice among photographers, designers, and marketers. Here's why:
1. Enhanced Visual Appeal
A transparent background allows the subject to stand out, making the image more versatile for various designs and layouts.
2. Seamless Integration
Images without backgrounds can be effortlessly integrated into different platforms, such as websites, presentations, or marketing materials, without clashing with existing color schemes.
3. Professional Presentation
For e-commerce and product photography, removing the white background ensures a clean, consistent look across product listings, enhancing professionalism and trustworthiness.
Part 2: How to Remove a White Background Easily in Photoshop
Adobe Photoshop offers multiple methods to remove white backgrounds. Below are some effective techniques:
Method 1: Using the Quick Action 'Remove Background'
1.Open Your Image: Launch Photoshop and open the image you want to edit.
2.Access Quick Actions: Navigate to the Properties panel. If it's not visible, go to Window > Properties.
3.Remove Background: In the Quick Actions section, click on Remove Background. Photoshop will automatically detect and remove the white background.
Note: This feature is available in Photoshop 2020 and later versions.
Method 2: Using the Magic Wand Tool
1.Select the Magic Wand Tool: From the toolbar, choose the Magic Wand Tool.
2.Adjust Tolerance: Set the tolerance to around 20-30 to select the white background effectively.
3.Select and Delete: Click on the white background to select it, then press Delete to remove it.
4.Deselect: Press Ctrl+D (Windows) or Cmd+D (Mac) to deselect the selection.
Method 3: Using Select and Mask
1.Make a Selection: Use any selection tool (e.g., Quick Selection Tool) to select the subject.
2.Refine the Selection: Click on Select and Mask in the options bar.
3.Adjust Settings: Use the Refine Edge Brush Tool to improve the selection, especially around hair or intricate edges.
4.Output: Set the output to New Layer with Layer Mask and click OK.
These methods provide flexibility depending on the complexity of the image and the desired outcome.
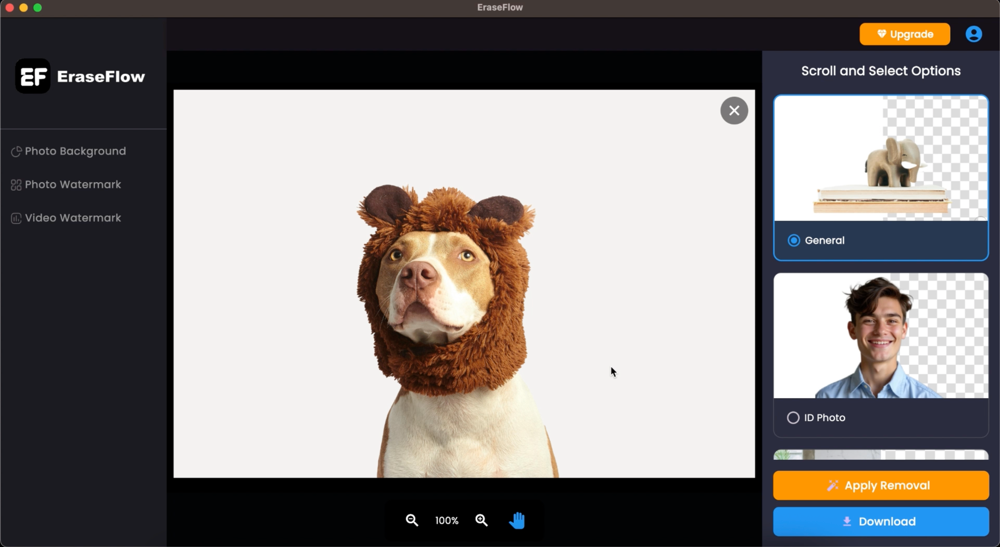
Part 3: Alternative: Eraseflow.com, Your Image Background Editing Tool
For those seeking a quick and user-friendly alternative without the need for advanced software, EraseFlow.com offers an efficient solution.
Key Features of Eraseflow.com
- AI-Powered Background Removal: Automatically detects and removes backgrounds with precision.
- User-Friendly Interface: No technical skills required; simply upload your image and let the tool do the work.
- Supports Various Formats: Compatible with JPEG, PNG, and other common image formats.
- Free to Use: Offers background removal services at no cost.
How to Use Eraseflow.com
1. Upload Your Image: Visit Eraseflow.com and upload the image you wish to edit.
2. Automatic Processing: The tool will automatically process the image and remove the background.
3. Download the Result: Once processed, download the image with a transparent background.
Eraseflow.com is an excellent choice for quick edits, especially when Photoshop is not readily available.
By understanding the importance of background removal and utilizing tools like Adobe Photoshop and Eraseflow.com, you can enhance your images' versatility and professionalism.
Leonardo Rossi
Apr 27, 2025