How to Make Background Transparent in GIMP: Complete Tutorial
Creating images with transparent backgrounds is essential for various design projects, from website graphics to product mockups and digital art. GIMP (GNU Image Manipulation Program) is a powerful, free alternative to Photoshop that offers several methods for removing backgrounds and creating transparency. This comprehensive tutorial will guide you through multiple techniques to achieve professional-looking transparent backgrounds in GIMP, while also introducing you to more efficient alternatives for complex projects.
Understanding Transparency in GIMP
Before diving into specific techniques, it's important to understand how GIMP handles transparency:
- Alpha Channel: This is GIMP's way of storing transparency information. An alpha channel is essentially a grayscale image where white represents fully opaque areas and black represents fully transparent areas.
- Checkered Pattern: GIMP displays transparent areas with a gray and white checkered pattern. This pattern is not part of your image—it's just a visual indicator of transparency.
- File Formats: Not all file formats support transparency. PNG and WebP are the most common web-friendly formats that preserve transparency. JPEG does not support transparency.
With these concepts in mind, let's explore different methods for creating transparent backgrounds in GIMP.
Method 1: Using the Fuzzy Select Tool (Magic Wand)
The Fuzzy Select Tool (often called the Magic Wand in other programs) is ideal for images with clear contrast between the subject and background.
Step 1: Prepare Your Image
Open your image in GIMP. If your image doesn't already have an alpha channel, add one by right-clicking on the layer in the Layers panel and selecting "Add Alpha Channel." If this option is grayed out, your image already has an alpha channel.
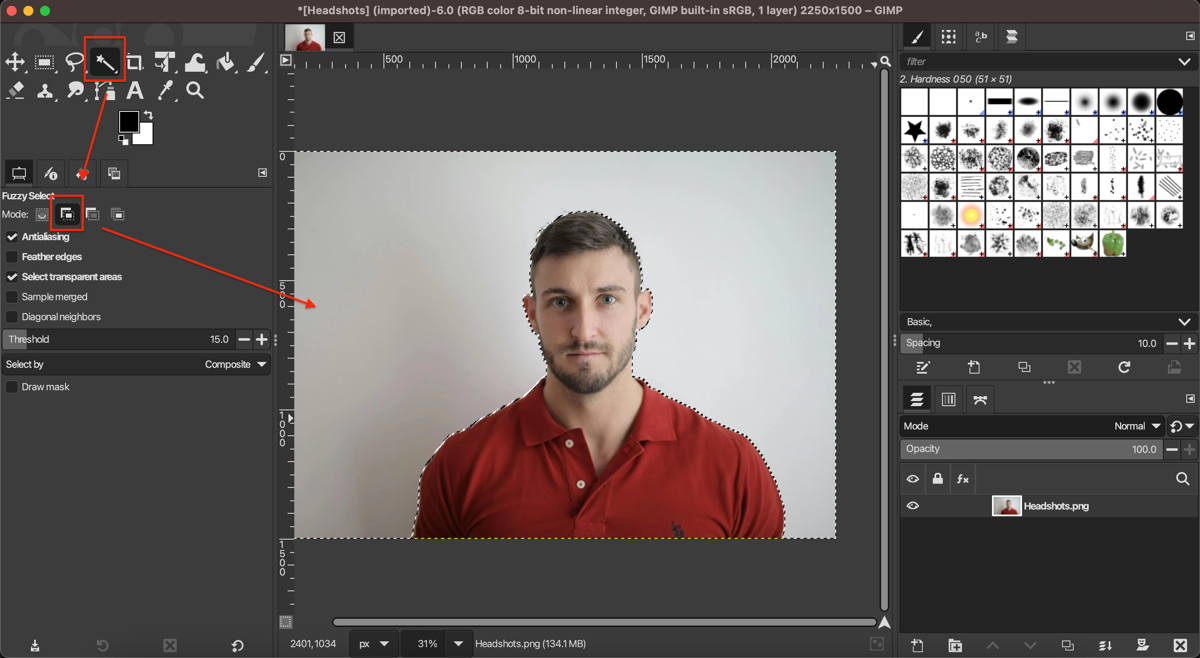
Step 2: Select the Background
Choose the Fuzzy Select Tool from the toolbox (it looks like a magic wand) or press U on your keyboard. Click on the background area you want to make transparent. If your background has multiple colors or sections, hold Shift and click on additional areas to add to your selection.
Adjust the "Threshold" in the tool options to control how similar colors need to be to get selected. A higher threshold selects a broader range of colors.
Step 3: Refine Your Selection
If needed, refine your selection using:
- Select > Grow or Select > Shrink to adjust the selection boundary
- Select > Feather to soften the edges (2-5 pixels usually works well)
- The Quick Mask mode (press Shift+Q) to paint your selection more precisely
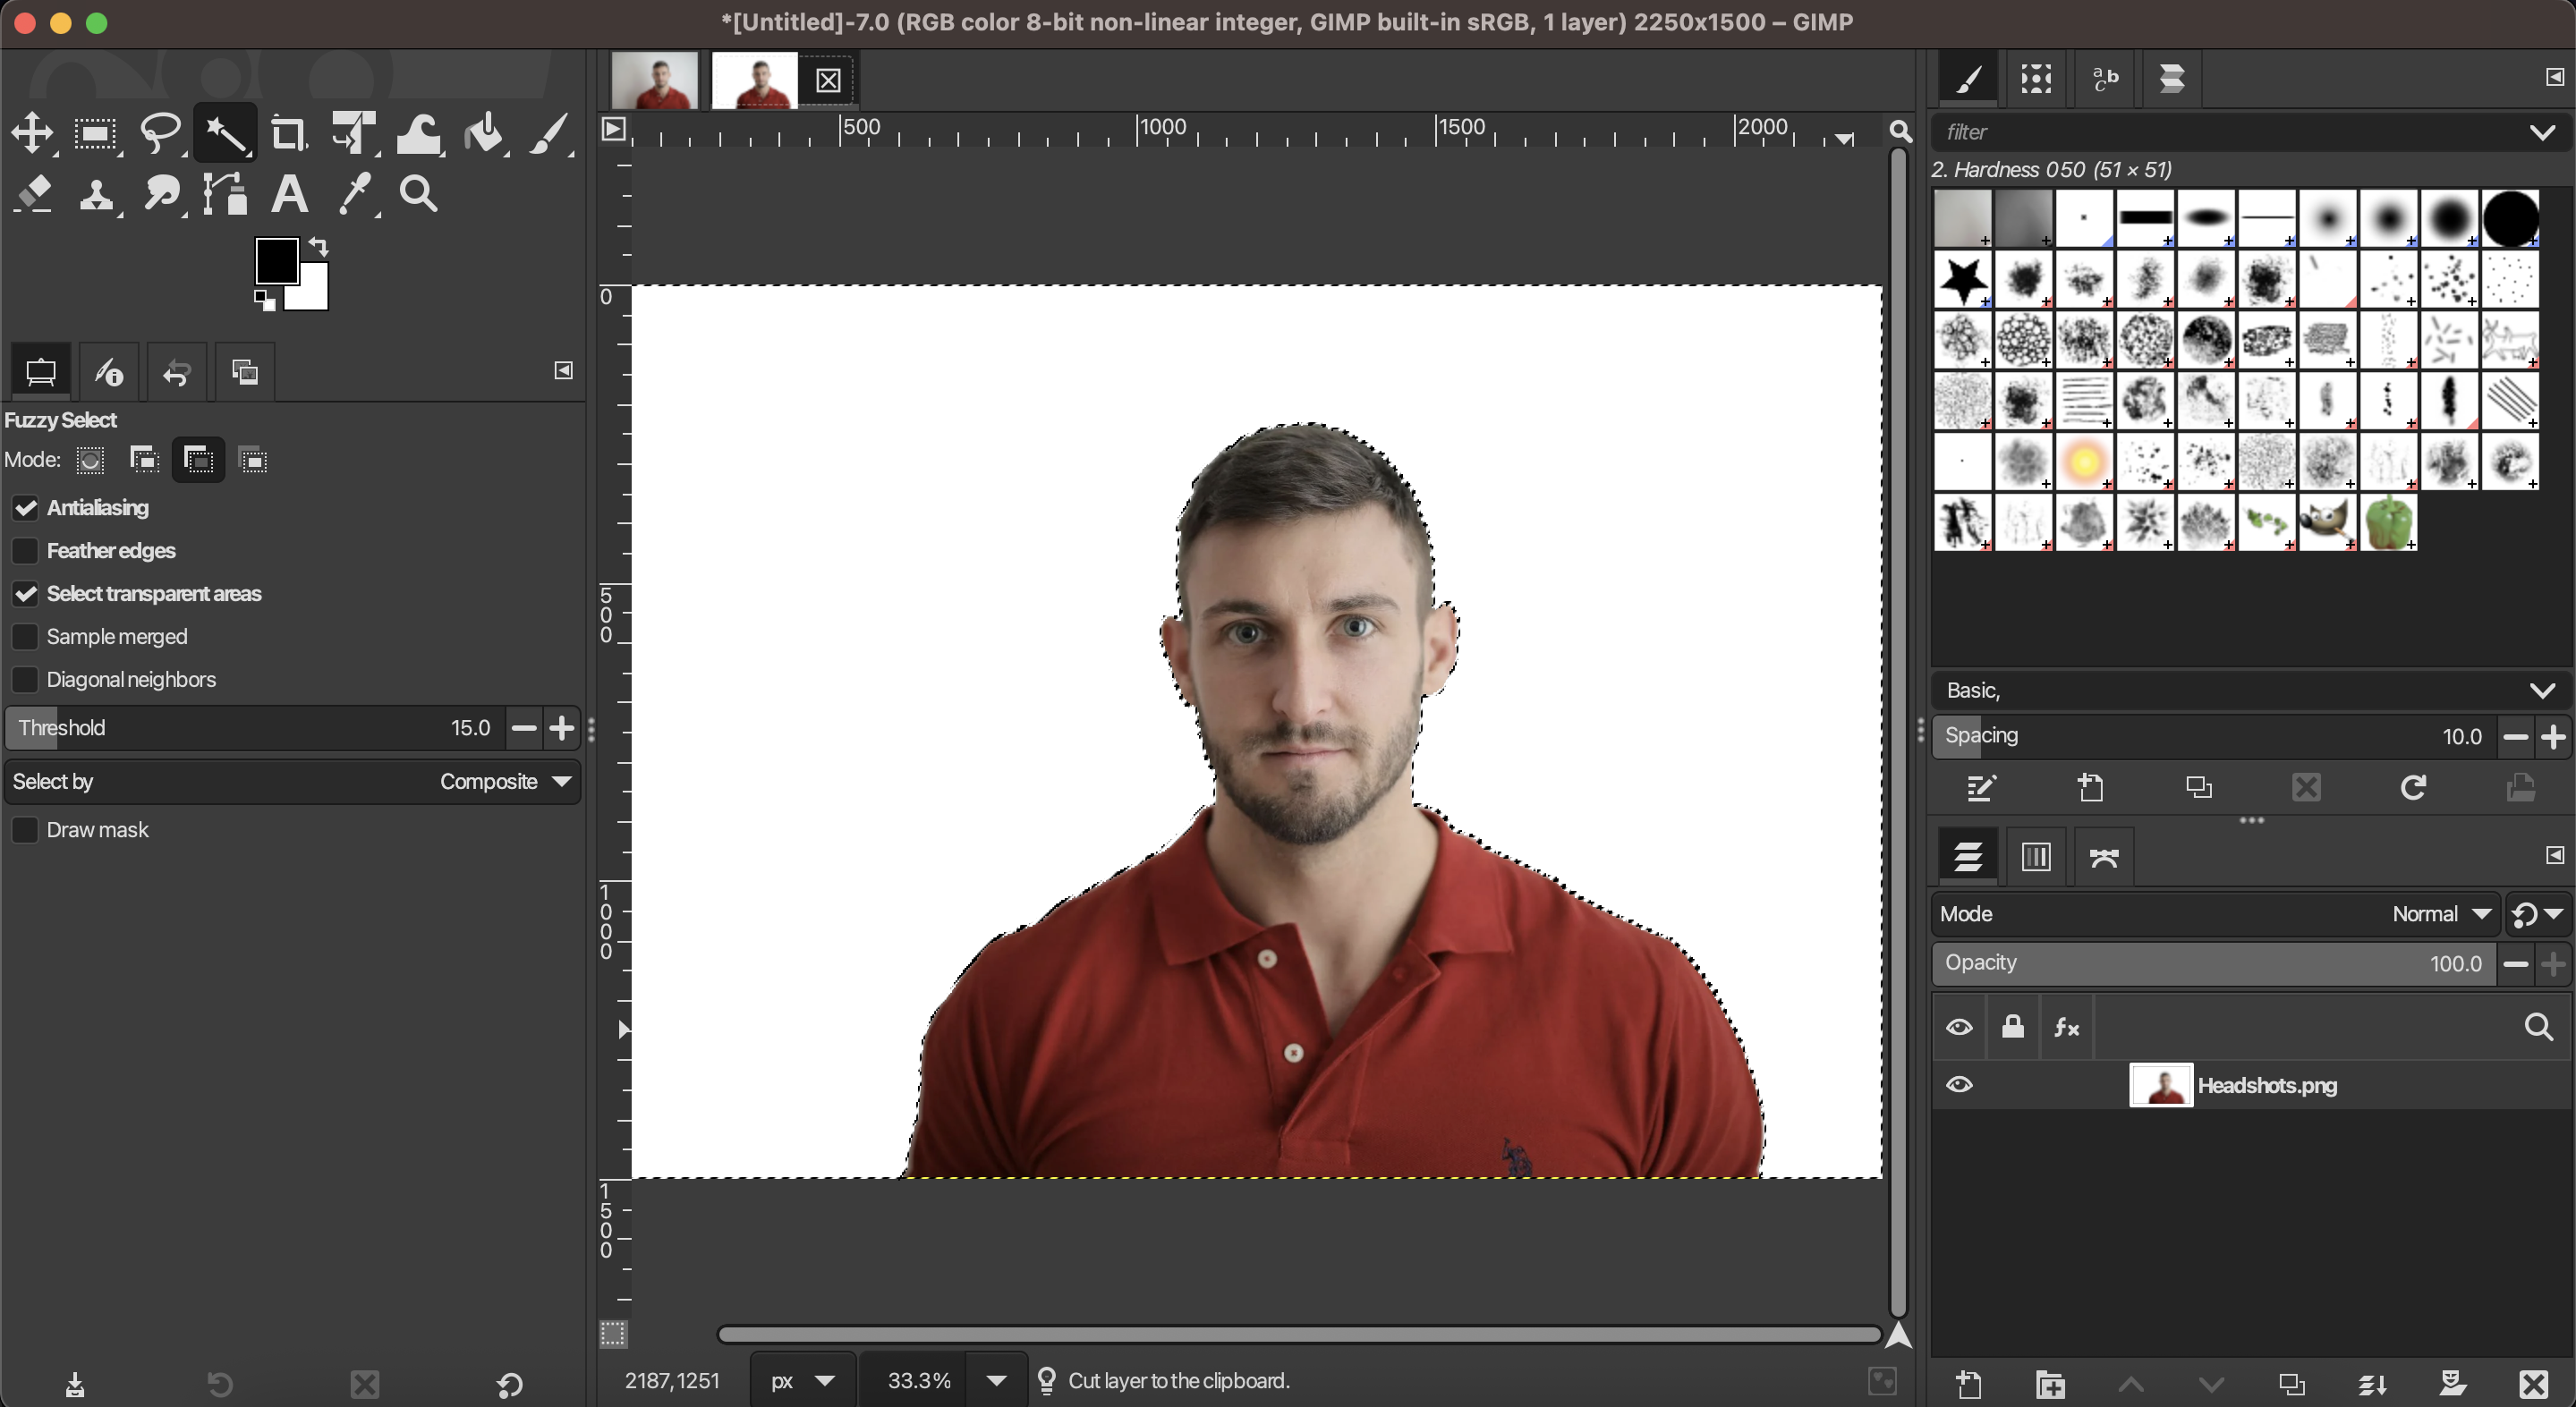
Step 4: Delete the Background
With your background selected, press Delete or go to Edit > Clear to remove it. The selected area will become transparent, indicated by the checkered pattern.
Step 5: Save with Transparency
Go to File > Export As and choose PNG (.png) or WebP (.webp) as your file format. In the export dialog, make sure "Save alpha channel" is checked if that option appears.
Method 2: Using the Paths Tool for Precise Selections
For images with clear, defined edges, the Paths Tool offers more precision than the Fuzzy Select Tool.
Step 1: Add an Alpha Channel
As with Method 1, ensure your image has an alpha channel by right-clicking the layer and selecting "Add Alpha Channel" if necessary.
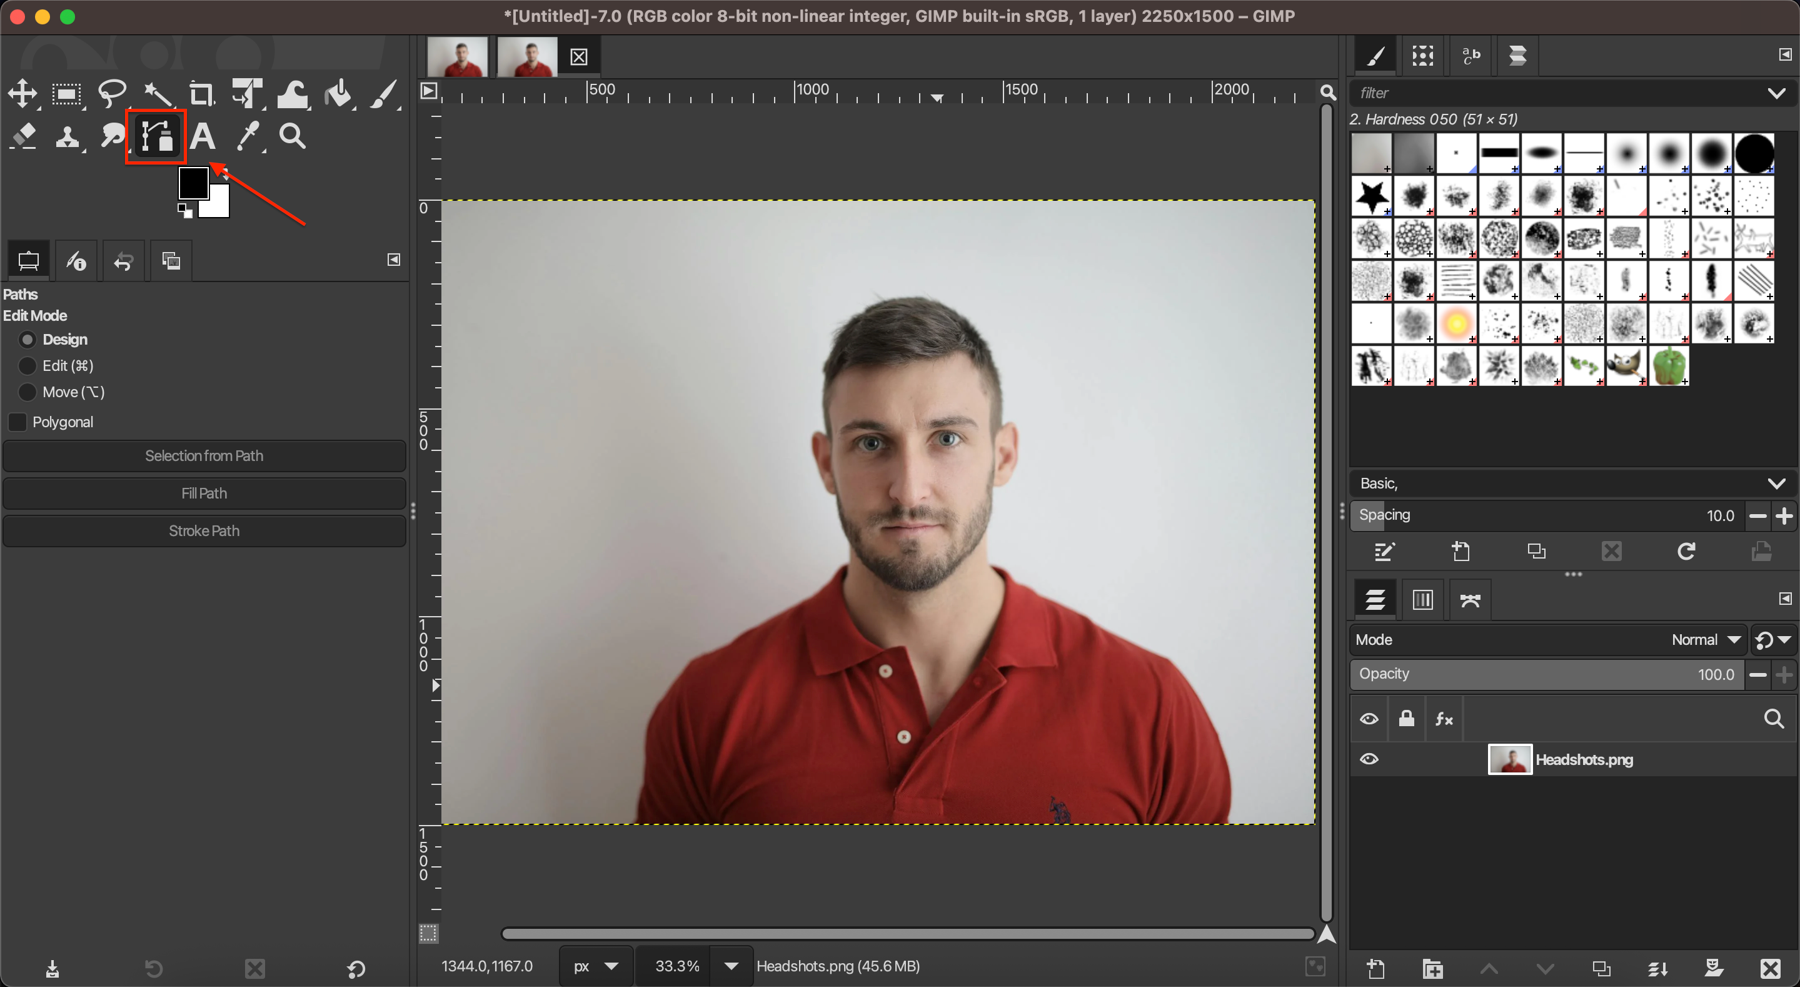
Step 2: Create a Path Around Your Subject
Select the Paths Tool (it looks like a pen nib) from the toolbox or press B. Click around the edges of your subject to create anchor points, forming a path that outlines the subject. For curved sections, click and drag to create smooth curves.
Complete the path by clicking on the first point you created. The path will appear as a thin line around your subject.
Step 3: Convert Path to Selection
Right-click on the canvas and choose "Path to Selection." This converts your path into a selection outline.
Step 4: Invert the Selection
Since you've selected your subject (not the background), go to Select > Invert or press Ctrl+I to invert the selection so that the background is selected instead.
Step 5: Delete the Background
Press Delete or go to Edit > Clear to remove the background. The selected area will become transparent.
Step 6: Save with Transparency
Export your image as a PNG or WebP file as described in Method 1.
Method 3: Using Layer Masks for Non-Destructive Editing
Layer masks allow you to hide portions of a layer without permanently deleting them, making this method ideal for complex images or when you want to preserve your original image.
Step 1: Add a Layer Mask
Right-click on your image layer in the Layers panel and select "Add Layer Mask." Choose "White (Full Opacity)" in the dialog that appears.
Step 2: Select the Background
Use any selection tool (Fuzzy Select, Paths Tool, etc.) to select the background as described in the previous methods.
Step 3: Fill the Selection with Black on the Mask
Make sure the layer mask is active (it will have a white border in the Layers panel). Set your foreground color to black, then press Alt+Backspace or go to Edit > Fill with FG Color to fill the selected area with black on the mask.
The background will become transparent, but the original pixels are preserved in the layer and can be recovered by editing the mask.
Step 4: Refine the Mask
Select the Brush Tool (press P) and paint with black to hide more areas or with white to reveal areas you accidentally removed. This allows for precise control over your transparency.
Step 5: Save with Transparency
Export your image as a PNG or WebP file as described earlier.
Method 4: Using the Foreground Select Tool for Complex Images
GIMP's Foreground Select Tool is particularly useful for images with complex subjects, such as people with detailed hair or fur.
Step 1: Prepare Your Image
Ensure your image has an alpha channel as described in previous methods.
Step 2: Use the Foreground Select Tool
Select the Foreground Select Tool from the toolbox. Draw a rough outline around your subject (this doesn't need to be precise). Once you complete the outline, the area outside it will be covered with a blue mask.
Step 3: Mark Foreground Areas
The tool will switch to marking mode. Paint over areas of your subject with the brush to mark them as foreground. Focus on different colors and textures within your subject.
Step 4: Process the Selection
Press Enter to process your marks. GIMP will analyze the image and create a selection based on your markings.
Step 5: Refine and Apply
Refine the selection if needed using the methods described earlier. Then invert the selection (Select > Invert) and delete the background or apply a layer mask as described in Method 3.
Step 6: Save with Transparency
Export your image as a PNG or WebP file.
Tips for Better Results in GIMP
- Zoom In for Precision: Use Ctrl++ to zoom in when working on detailed areas.
- Use the Eraser with Varying Opacity: For semi-transparent edges like hair, use the Eraser tool with reduced opacity.
- Feather Selections: For natural-looking edges, apply a small feather (1-3 pixels) to your selections.
- Work with Duplicate Layers: Keep your original image on a locked layer below your working layer for reference.
- Check Your Work Against Different Backgrounds: Add temporary colored layers beneath your image to check for leftover background pixels or halos.
Limitations of GIMP for Background Removal
While GIMP is powerful and free, it does have some limitations when it comes to background removal:
- Time-Consuming Process: Manual selection and masking can take significant time, especially for complex images.
- Learning Curve: GIMP's interface and tools require practice to master.
- Challenging Edge Cases: Fine details like hair, fur, and transparent objects can be extremely difficult to select accurately.
- No Automated AI Tools: Unlike modern alternatives, GIMP lacks built-in AI-powered background removal.
EraseFlow: A Faster, More Accurate Alternative
For those who need professional results without the time investment of manual editing, EraseFlow offers a compelling alternative:
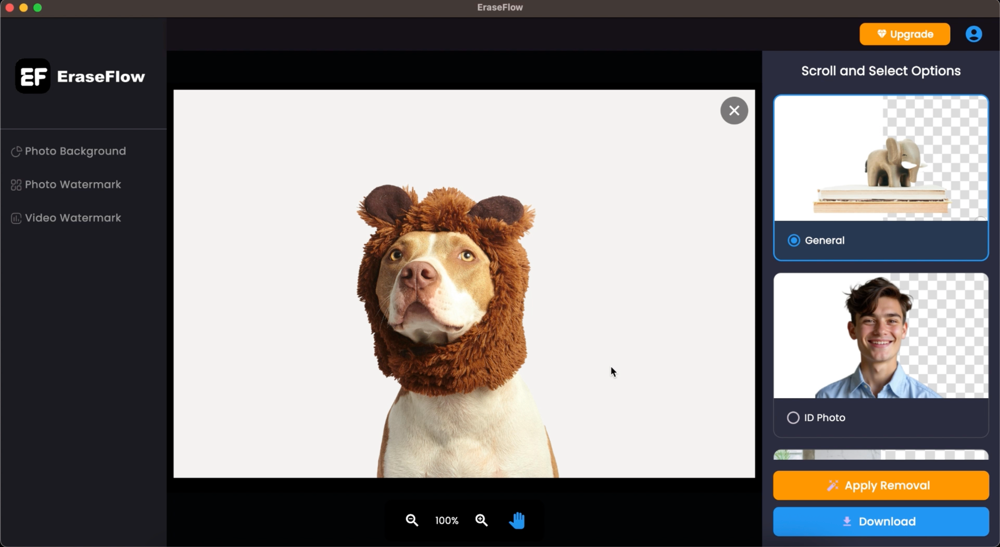
- AI-Powered Precision: EraseFlow uses advanced algorithms to automatically detect subjects and remove backgrounds with remarkable accuracy, even with challenging elements like hair and fur.
- One-Click Process: What might take 30 minutes in GIMP can be accomplished in seconds with EraseFlow.
- No Technical Expertise Required: The intuitive interface makes professional-quality background removal accessible to everyone, regardless of design experience.
- High-Resolution Support: Process large, high-quality images without degradation, essential for professional printing and displays.
- Batch Processing: Save even more time by processing multiple images simultaneously.
While GIMP remains an excellent free tool for occasional background removal and general image editing, EraseFlow's specialized technology offers significant advantages for those who regularly need transparent backgrounds or work with challenging images.
When to Use GIMP vs. EraseFlow
GIMP is ideal when:
- You're working with simple images with clear contrast between subject and background
- You need complete control over every aspect of the selection process
- You're on a tight budget and have time to invest in manual editing
- You need additional image editing capabilities beyond background removal
EraseFlow is the better choice when:
- You're working with complex subjects (hair, fur, transparent objects)
- You need professional-quality results quickly
- You have multiple images to process
- You don't have extensive experience with image editing software
- Time efficiency is important to your workflow
Conclusion: Choosing the Right Approach for Your Needs
Creating transparent backgrounds in GIMP is certainly possible with the techniques outlined in this tutorial. For occasional editing or simple images, GIMP provides a capable, free solution that can produce good results with practice and patience.
However, for professional work, complex images, or situations where time is valuable, specialized tools like EraseFlow offer significant advantages. The combination of AI-powered precision, speed, and ease of use makes it a worthwhile investment for anyone who regularly works with images.
We recommend trying both approaches to determine which best fits your specific needs. EraseFlow offers 8 free credits upon signup, allowing you to experience the difference in quality and efficiency firsthand before making a decision.

Leonardo Rossi
May 21, 2025